Foam Rolling for Endurance Sports
How you can use foam rollers to improve performance
In order to execute your best performance in endurance sports, you need to utilize every possible small gain, which is why you should dedicate a short amount of time before each workout to foam rolling. Just like coaches who target workouts that stimulate specific responses, it's wise to only use foam rollers in specific ways, rather than rolling randomly and haphazardly — and potentially creating problems for yourself. This post shows you proper foam rolling techniques for endurance athletes, with detailed information and diagrams.
Why should you roll?
The popularity of foam rolling has increased dramatically over the past few years, and it's garnered a reputation for being extremely painful. Perhaps you've seen funny memes like this:
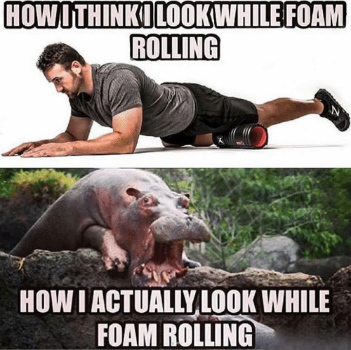
Rolling does cause dull pain on certain muscles and ligaments, but it shouldn't be excruciating. If you experience intense pain, immediately stop and have it checked out by a physician. Above all, don't let unnecessary fear keep you from maximizing the benefits of foam rolling.
We have connective tissue beneath our skin called "fascia" that separates our muscles, in addition to keeping them attached and stabilized. When fascia is healthy, it's limber and moves smoothly. Unfortunately, the repetitive motions of endurance sports cause fascia to get bunched up, which keeps you from preforming optimally. The solution is to do some simple foam rolls, which you can execute by yourself in under 10 minutes.
How to get rolling...
Keep things simple and focused. Concentrate on a few specific areas, and get yourself in the habit of rolling before every workout. There are advanced foam rollers with ridges and electronics, but the inexpensive Basic High Density Roller option from Amazon works well and is a good place to start. If you travel a lot, there are smaller rollers available that have hollow cores that are easy to pack, such as the TriggerPoint Grid Foam Roller.
Yoga mats can also be helpful. They keep the roller from slipping when you're applying pressure at odd angles, and they make floors more comfortable. But don't let the absence of a yoga mat keep you from rolling. Focus on improving your performance and get on the floor.
Only use your bodyweight to apply pressure. Work on each targeted area for 30 to 60 seconds. If you feel any tightness or sensitive areas, pause and relax on this spot for 5 to 30 seconds. Don't rush your rolls. Always move slowly and gently.
How to foam roll quads

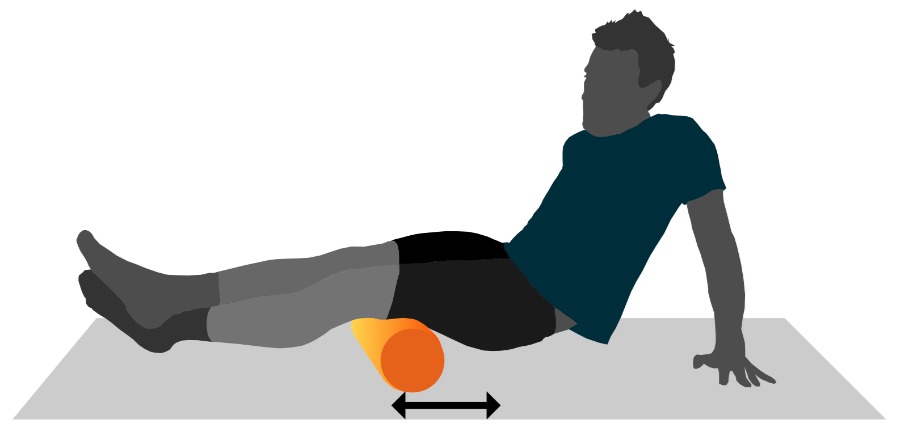
Quadriceps do lots of repetitive work in running and cycling, so it's an important area to roll:
- Work one quad at a time
- Keep one leg on the floor resting on your knee, and the other leg on the roller with your foot elevated off of the ground
- Do not use the roller on your knees
- Only go as far as the very top of your knee and roll up to your hip
- For extra pressure after a workout, instead of resting on one knee lift that leg up
How to foam roll tensor fasciae latae (TFL)
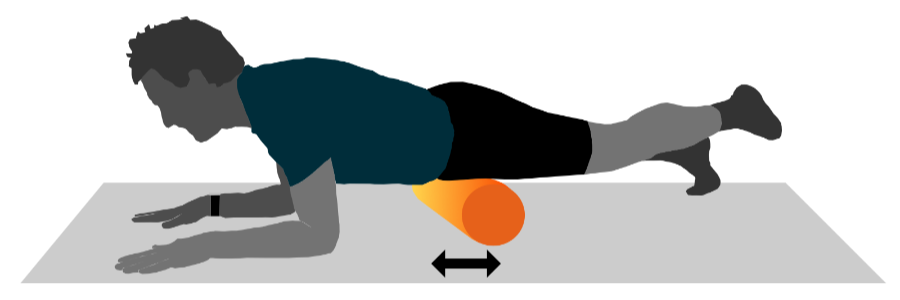
Your tensor fasciae latae (TFL) is a short muscle at the top of your thighs. It's connected to your iliotibial tract (IT band) and works in concert with the gluteus maximus when running. Rolling your IT bands can cause damage in some situations, but rolling your TFLs is beneficial and can alleviate issues with your IT bands without interfering with them.
- Familiarize yourself with the exact location of your TFL muscles
- Work one TFL at a time, leaning your weight into the side that you're targeting
- Keep the opposite foot on the floor for balance and stability
- On the side you're rolling, raise that foot off of the ground and point your toes slightly inward
- Keep the rolling motion short, because the muscle itself is short
- Remove the roller and use a tennis ball in its place to more precisely work tight and sensitive areas
How to foam roll glutes
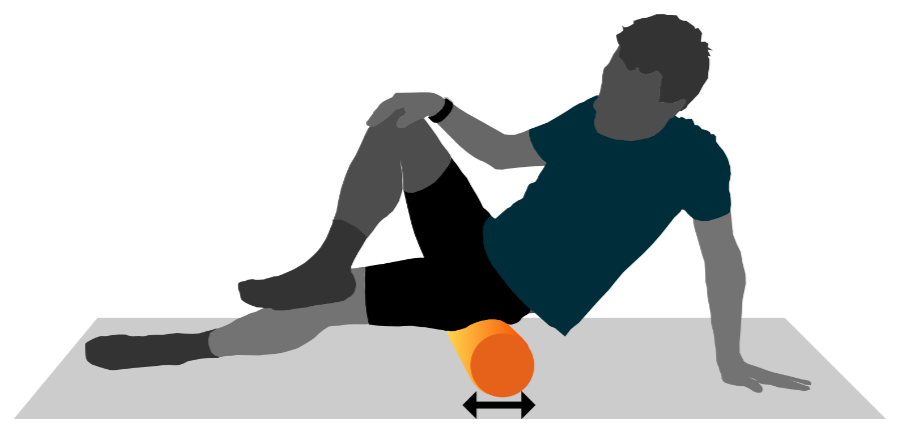
Your glutes are a big part of the engine that powers your runs and rides. Like the TFL, glute muscles are connected to IT bands. Working your glutes with a roller can benefit your IT bands without interfering with them.
- Work one cheek at a time
- Sit on your roller with knees bent, supporting yourself with your hands behind you
- Cross your leg leaning your weight onto the side you're targeting and balance yourself by putting one hand on your knee like in the graphic above
- Perform a short roll targeting only your glutes
- They are big muscles, so you should move around a bit to work the entire area
How to foam roll calves
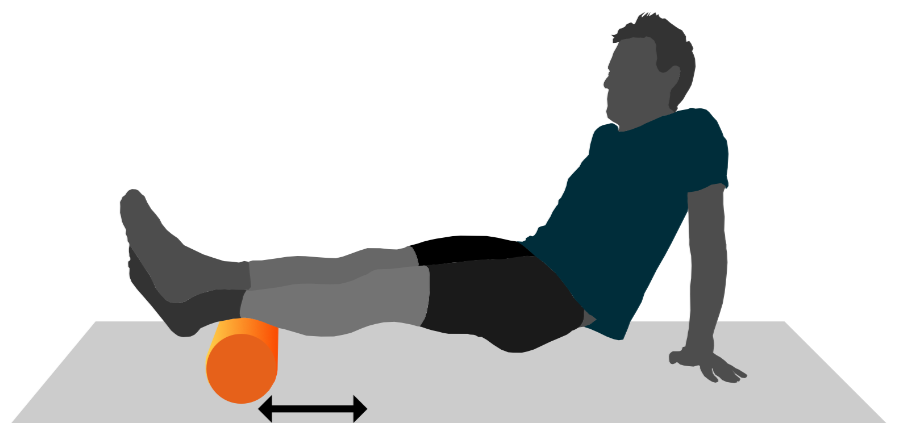
While not completely necessary, crossing your legs when foam rolling your calves adds a healthy amount of pressure.
- Work one calf at a time
- Place your ankles on the roller as if you were resting them on a coffee table
- Lift your body off the floor with your hands
- Roll from the ankle to just below the back of your knee
- After rolling the first calf, cross your legs again so the other calf is in the lower position
How to foam roll hamstrings
The hamstring position is very similar to what you do for the calves, and because these muscles are on the back of your legs, crossing your legs adds helpful pressure.
- Work one hamstring at a time
- Start with the roller at the top of the backside of your knee
- Roll up to the glutes and back
- After rolling the first hamstring, cross your legs again so the other one is in the lower position
Final tips...
As long as you use it carefully, a foam roller can be seriously helpful. They can even be used to roll after a day of traveling or when you’ve been sitting at a desk for long periods of time. Be mindful not to roll bones, and don’t blindly roll an injury without advice from a doctor or an experienced coach.
| Article written by Sam Mallery, Director of Marketing, Zone Five Software Inc. |

