Build the Perfect Pain Cave
Essential items that make indoor cycling more enjoyable
What gear do you need for indoor cycling? You could use just a cycling trainer with a bike mounted to it. A bare-bones setup like this can provide a workout — it just won't be enjoyable. Thankfully, there are many additional items available that make indoor cycling a vastly better experience. It takes many hours of internet research to figure what they all are, so to save you the trouble we've put them all in this article.
The Trainer Itself
Cycling trainers, which are referred to as "turbos" in some countries, come in many shapes and sizes. Since it's the most central component to your indoor training setup, we advise buying the best one you can afford. Buy once, cry once!
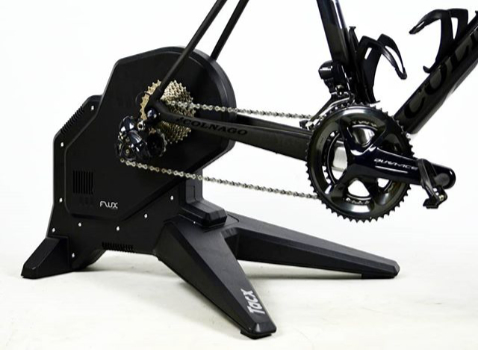
There are traditional "dumb" trainers that do not change resistance, and "smart" trainers that interact with software to adjust the resistance of the trainer in real-time. Smart trainers make interval workouts and structured training far more compelling, so they're definitely worth the extra cost. Check out our article The Best Affordable Smart Trainers for more information, and also visit the DC Rainmaker blog, which has excellent reviews of this kind of equipment.
Fans and Remote Controls
The second most vital pieces of equipment for your pain cave are fans. Like all things, there are fancy options available, but thankfully this is an area where expensive equipment isn't a must-have. You probably already own a couple of suitable fans.
One thing to consider, however, is how you control them. When you first start riding, you likely won't want a fan blasting against your body. The first 10 minutes of warmup are sometimes best done with no fan at all, but there will certainly be a point when you want your fans to kick in.
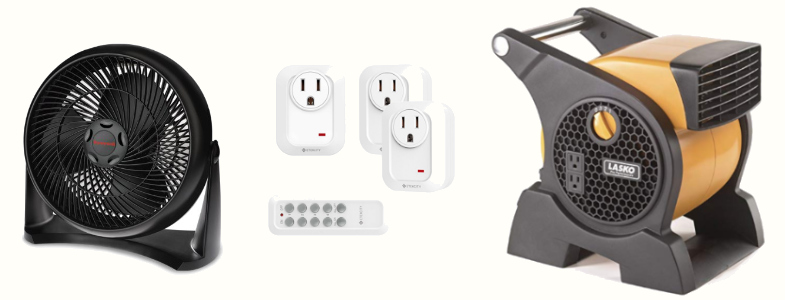
This is where a remote-control system for your fan comes in handy, and thankfully they're reasonably priced. These systems consist of a device that you connect to the AC plug of the fan, and a handheld remote control. When you get hot and want the fan, you pick up the remote, press a button, and the fan goes on. This enables you to adjust your cooling without needing to pause your workout, unclip from the pedals, dismount the bike, turn the fan on, then repeat these steps in reverse order.
For an example of a remote control system, check out this one from Etekcity. It comes with three outlet plugs, so you can control multiple fans. An advantage of this solution is that it doesn't have an internet connection. You don't need to ask Alexa or Google to turn it on. It's nice and dumb. As far as what fans to use, cyclists tend to prefer more directional fans like the Honeywell HT-908. Other designs like the Lasko Pro Performance are also popular.
Sweat Control
Even with a couple of good fans blowing air on you during your workouts, you're still going to sweat like a hog on your indoor trainer. That's why it's important to anticipate this perspiration and have a plan for how to control it. In general, there are two areas you want to protect: your bike and your floor.
Thankfully, this is another area that's relatively inexpensive. When it comes to protecting your bike, be sure to have a few fresh towels handy. It's a good idea to keep one right on your handlebars, ideally covering your headset and stem, where sweat can cause serious corrosive damage. There are products made specifically for this task too, of course, like the Blackburn Sweat Net.
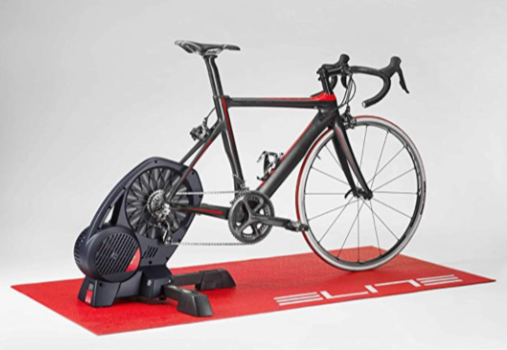
You may be tempted to use an old yoga mat to protect your floor. This is a perfectly acceptable solution, especially if you're on a budget, but you may want to consider getting a dedicated trainer mat before you reject the idea outright. These mats are designed to handle the weight of the trainer, bike, and rider. They protect your floors from sweat, but they also help cut down on vibration noise from the trainer. They're easy to wipe clean afterward, and they can help create an appealing visual aesthetic in your cave. The Wahoo mats are a popular choice.
Where you gonna put that remote?
It may not seem obvious at first, but the second you get on your bike trainer you're likely going to need to reach and grab something. It could be the remote for your fan, the remote for your TV, your phone, a drink, etc. Having a surface next to your bike is incredibly useful, and an essential part of your indoor cycling setup.
This is another area where the simplest folding tray table will do, but it's helpful to have a surface that can be raised or lowered to your height preference. It's also nice to have a design that can tuck in a little closer and work with the curvy proportions of your bike. A good option here is an over beside food table. It wouldn't be cycling if there wasn't a fancy option, though. For this look no further than the Wahoo KICKR Bike Desk which was purpose built for indoor cycling.
Whats on TV?
Entertainment is a vital part of indoor training, otherwise you're just staring at a wall, working incredibly hard, and traveling nowhere. For some people a smartphone, tablet, or a laptop may be enough. If you ride a smart trainer, you'll likely want to utlize a software cycling platform like TrainerRoad or Zwift. They can run on the aforementioned devices, but they offer far more immersive experiences on larger screens.
Consider purchasing a dedicated smart TV for your pain cave. You can save money by not going for a huge screen size, often times 43 inches (109cm) is plenty. Good quality smart TVs — some which feature Roku built in — can be had for a reasonable amount of money. The smart features will let you stream your favorite content on demand, and the multiple HDMI inputs enable you to connect exterior devices, like an Apple TV 4K for running the impressive Zwift app.
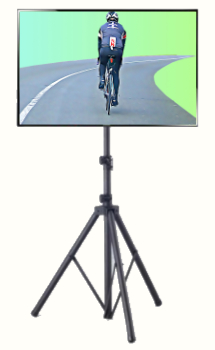
There's another part of your TV setup worth considering: a tripod TV stand. This gives you options. Opposed to permanently mounting a TV to the wall or placing it on a shelf, the tripod stand enables you to put it where you want it. Need to move your cave to a new room for a while? No problem, pack up and go. In a training rut? Move your trainer to a new location in your cave and gain a fresh perspective. Tripod stands also give your setup a clean, finished look.
Cassette Installation
The vast majority of indoor trainers are sold without a cassette, and without one — you can't use it! The top-of-the-line Wahoo KICKR is the only trainer we're aware of that comes with a cassette. This purchase and installation can be handled at your local bike shop, which is always great option, but if you're the type of person who likes to do things yourself, you're going to need a couple of special tools.
First of all, you're going to need the cassette itself. The best cassette for your needs depends on the drivetrain of your bike. For example, the cassette of my Giant Defy 1 Disc is a Shimano 105 CS-5800 11/32. Once you've got your cassette choice figured out, you need to turn your attention to installation tools.

The main item you need is a cassette/rotor lockring removal tool. The exact tool you need depends on the manufacturer of your cassette, but the majority of indoor cyclists need a tool compatible with Shimano, SRAM, SunRace, SunTour, and Chris King. If you fall into this camp, a good choice for you is the Park Tool FR-5/FR-5G. You will also need a 1-inch wrench to use this tool.
When you need to tighten the cassette to your trainer, it's necessary in most cases to prevent it from turning. A special tool called a chain whip is required for this task, and a great option here is the Park Tool SR-12. Sometimes you can get away with this installation without using a chain whip, but if you ever need to remove a cassette, a chain whip is a necessity.
A few more items to consider
- If you're setting up your pain cave in a remote section of your home, you're likely going to need a strong internet signal to stream video and ride your bike in virtual worlds. If your Wi-Fi isn't strong enough, consider upgrading to a mesh network like Eero or Google Wi-Fi.
- That sweet TV you bought looks great, but it likely lacks in sound quality. Consider how you're going to listen to TV, music, and other content, and buy the appropriate speaker or headphone system for listening.
- A great thing about indoor cycling is that you don't need to wear a helmet when you ride. However, your cycling saddle isn't any more forgiving indoors, so you're still going to need cycling bibs and shorts with comfortable chamois pads. Make sure you've got at least one comfortable pair, at bare minimum.
Phew! That's a lot of stuff! Think of this as a long-term investment in your health and fitness. If it's too cold to ride outdoors, you can train safely indoors. Whether you're trying to get faster by following a program in TrainerRoad, or creating custom structured workouts in SportTracks to ride indoors with your Garmin head unit, you will be engaged and active.
How did we do? Did we miss any key items? Let us know in the comments section below...
| Article written by Sam Mallery, Director of Marketing, Zone Five Software Inc. |